Thursday, May 2, 2013

Salsa: Not The Dance!

About ten years ago there was a potluck at my job.  Someone brought a bowl of salsa.  It was really more like a pico de gallo, but he called it salsa and that is what I call it. 

It was so good that I kept going back for more.  Finally I asked for the recipe and stopped on the way home for the ingredients.  John came home to find me making food. After he fell over and I revived him, he tried it.

He liked it, too. A new favorite was born. 

We decided to blog about it after we started, so there isn't an ingredient stack picture.  But you will see the parts.  There isn't really a recipe, but you know when it is right.

You start with tomatoes.  I like the Roma for this.  They are meaty without too much juice.  Once you get things mixing, there is a lot of juice.


I strain the chopped tomatoes to cut down on the liquid. 


The first time I made this I used a food processor. That is what the recipe told me to do!  I am a recipe girl.  That is why I enjoy baking.  You add the ingredients in the right order and the correct measurements and you have success.  John likes to experiment.  We later got the Vidalia Onion Chopper and it saved us.  It chops them just right.  We love a gadget!


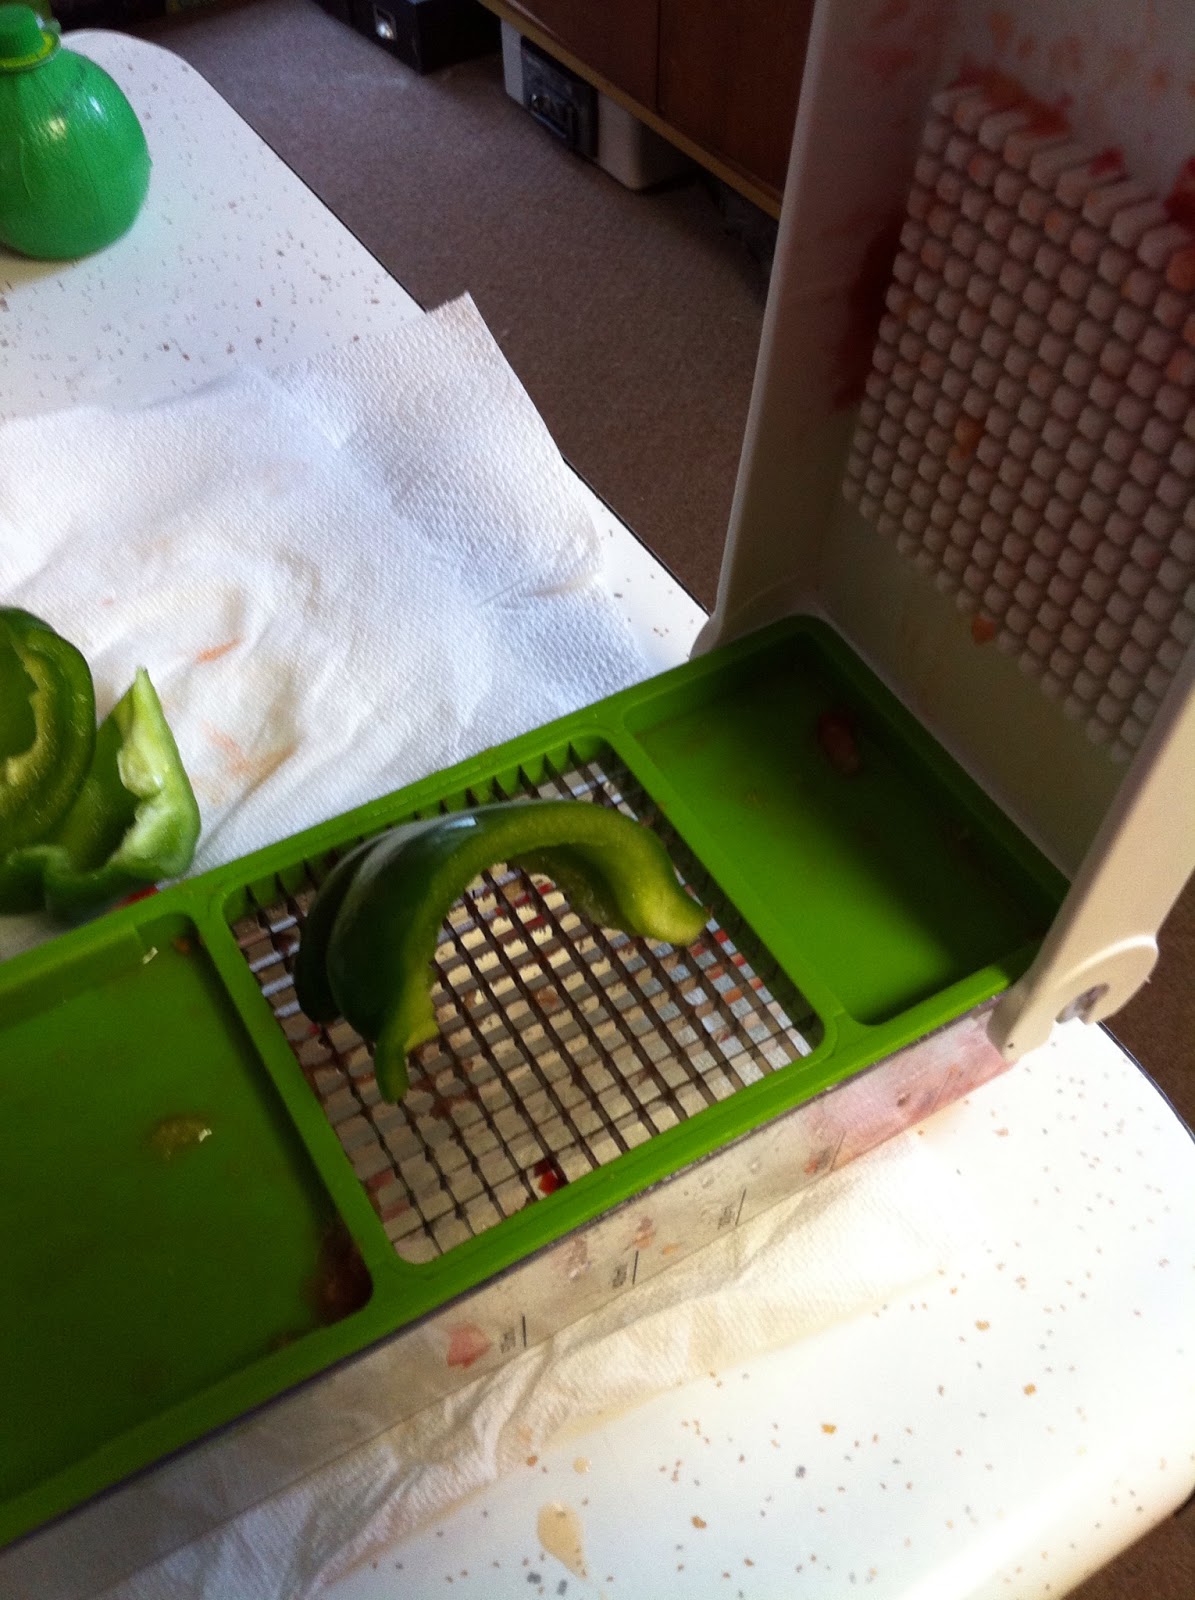
We add peppers.  A couple of green ones and a yellow one.  It makes a colorful salsa. 


Then we add a red onion.  I don't know why they call it a red onion.  It is really more purple.


Then John minces up the garlic. We buy garlic in bulk.  No vampires coming to our house.


Then there are olives.  I don't like olives.  I really don't like olives.  Not black ones.  Not green ones.  When I got the recipe and saw olives, I was shocked.  I tried to make it without them and something critical was missing.  So I added them and it was right.  It is the only thing I like olives in.  John chops them up super small so I can't see them.  Isn't he nice?


We add cilantro  It gives it a really fresh flavor.  I actually prefer the dried cilantro for this.  I have used fresh and it really changed the taste.


Lots of lime juice.  We use about half of one of those little fake limes. 


Then we add salt and pepper.  With all the tomatoes, it takes a lot.  We haven't been eating much salt lately so I thought I'd added too much at first, but it was better after adding another tomato. 


The last thing you add is the avocado.  You need to mix all the other ingredients and get it all tasting right before you add the avocado, so it doesn't get all smooshed up.  Dice up the avocado and fold it in.


It does take some testing to make sure it is right.  At a point all of it magically comes together.  The flavors are so fresh.  It is summertime in a bowl.


We have to taste it to make sure it is perfect.  Scoops were made for this salsa.


We also got new mixing bowls...perfect for holding fresh salsa. This stuff is so good it will always all get eaten at potlucks or big dinners, so make sure you save a little so you can have some for yourself!

Saturday, April 6, 2013

Homemade Granola


I always thought granola was something that only hippies and hikers ate. I discovered it's actually pretty good if you don't put stuff like raisins in it! Here's what Jo & I do to make homemade granola. It's very healthy and lasts quite a while. And for us older folks, it packs a good supply of fiber! :)
Our ingredients...

Our dog, Stevie, is anxious for anything that might fall on the floor. Gotta keep it clean!

We start by whisking up about half a cup of egg whites. This will help mix everything up, and put a nice crispy, brown coating on the finished granola. We also add about 1/2 cup of honey and 1/2 cup of applesauce.


Continue whisking and add about 1/4 cup of Splenda and some cinnamon (about 1-2 Tablespoons).


We also like the extra crunch and fiber provided by about 1/2 cup of rinsed quinoa.

Flax seed is another thing we like to add to the granola.  About 1/2 a cup.

For the quick oats, we add enough to get them evenly coated...probably 7 cups.

And almonds. Not the roasted, salted kind. The whole, raw almonds found with the baking products. I love raw almonds, and they are at their most healthy state when raw. They always remind me of Christmas at my Grandma's house, because she always had raw almonds in the shell in the mixed nut bowl. You had to use nutcrackers to get them open.

We like adding some raw coconut as well. Then spread it all out in a large pan (spray it with Pam non-stick spray...we use a deep-dish pizza pan). It may take 2 pans. Spread it thin enough so it will brown all the way thru.
Bake at 400 degrees until it starts browning on the bottom. Then...

Cut into sections so it's easy to flip. Flip them over and return to the oven for a few minutes to finish browning. Take out of the oven and let cool. Then break it up and store in ziploc bags. It stays well for a couple weeks.

Sunday, March 10, 2013

No Sugar Added Apple Crisp

So yesterday I was writing about cravings.  I had been thinking about apple crisp for a couple of weeks.  I really wanted some warm crisp topped with ice cream.   But alas, this is pretty high calorie stuff.  

I decided to experiment with a no sugar added apple crisp.  We had most of the things we needed already.  I have been eating the weight control oatmeal for breakfast.  We had apples already so we started it up.


I pulled out the apple corer/slicer from my Pampered Chef days. I sold the products just long enough to earn the gadgets.  That is how much I love gadgets.


I did forget how it worked, so there was a little more peel in the first apple than I intended.  This resulted in one of John and I's kitchen tiffs.  I kept turning, he wanted me to stop.  We worked it out.


The second apple went better.  I used one Red Delicious and one Granny Smith.   I liked mixing it up a bit.


We sprinkled it with about a teaspoon of cinnamon and nutmeg and two teaspoons of Splenda. 


I had this idea before we started.  I know myself and wondered how I would control myself with a batch of apple crisp.  So we put them in single serve ramekins!  We intended to make two but ended up with enough for four.  John added a little extra cinnamon at this point.


Then we sprinkled each with the oatmeal. 


Then we melted a couple tablespoons of butter. 


We drizzled this over the oats.  Next time we will probably toss the oats with the butter to crisp it up.  At this point, John and I talked about how to cook them.  John thought we should cover them, I didn't think so.  So we decided to test it out. 


We covered two and left two uncovered.


We also picked up some frozen Greek yogurt.  Well I got Greek, John got just regular frozen yogurt.  They were right next to each other.   We saw on Dr. Oz that it is way lower in calories than regular ice cream.  


After about twenty minutes we pulled the foil off of John's crisps and put them back in for a few more minute.  Then we pulled them out and let them cool for ten excruciating minutes.


We added a scoop of frozen yogurt and dug in.  They were awesome.   It was exactly what I'd been craving.  I can imagine them for a dinner party dessert.  I could have them all ready to go and just throw them in the oven during dinner. 

Delicious. 

Editor's note:  With the frozen yogurt, this dessert is only 185 calories.  That is awesome!

Saturday, March 9, 2013

French Fries

I know what you are thinking.   Jo, I thought this blog was about eating right.  You are making french fries?  Are you crazy?

That is beside the point. 

Part of our new lifestyle is the "Most of the time" part of the blog.   I know myself well enough that if I try to ignore a craving it will take over my life.   For Oscar night I wanted chicken wings and fries.  It just sounded right.  Salty, crispy goodness.

In the old days we would buy a big old bag of the frozen fries and eat a whole batch of them all deep fried.  We have changed that up a little bit.  First of all, we use fresh potatoes.


One potato per person.  Since John and I, plus our son were all having fries, that was three potatoes.  This is easily a third of the amount of fries we'd have eaten in the past.


John peels them up real nice.


This is our nifty little fry cutter.  Makes life easier.  I must admit I love a good kitchen gadget.  If it is "As Seen On TV" it is even better!


John secures the peeled potato onto the blades.  DO NOT DO THIS WITH YOUR FINGERS!  IT IS SHARP!  (I won't tell how I know this.)


Top on and press down.


This is a good workout.  Or would be if you were doing more than three potatoes.


Perfect french fries!


Then you need to let them soak in water for at least thirty minutes.  You can't really over soak them.  This gets some of the starch out of them and makes them crispier.


We deep fried ours.  We did five blazing chicken wings and a potato's worth of fries each. 


We did this again about a week later with sweet potatoes and really liked them with some Cajun seasoning on them.  They weren't as crispy as the regular fries.  We will keep working on that.  Craving quenched.


Monday, February 25, 2013

John's Chili

When Fall football weekends come around, followed by about 4 months of winter here in Iowa, not much is better for eating than really good chili. I've gone through 3 chili phases in my life...

Chili Phase 1- My first try at chili. When I was in college, I lived off-campus my senior year with 2 roommates. We had to cook meals. I decided I wanted to make a really good batch of chili. I found a "5-Alarm chili" kit at the grocery store. It was just a bag of all the chili powder, cumin, garlic powder, and stuff. Just add beans, hamburger, and tomato sauce. It was great, and got terrific reviews from all who ate it. And I usually made it spiced really hot.
Chili Phase 2- My first year out of college and in the working world. A co-worker brought a crock of chili to a potluck at work, and I fell in love with it. Diced tomatoes, onion, chopped jalapenos, ground beef, garlic, and chili beans in chili sauce. Simmer all day. I would make a crockpot full and eat only that all weekend. This was my chili of choice for 27 years. It even won "Best Chili" at a contest I entered.

Chili- The final phase- About a year ago, I found a recipe for Wendy's Chili. I've always LOVED Wendy's chili, so I had to give it a try. And it was pretty close. I have found the chili for my future! I love a chili that has a real chili-flavored gravy, and this is it. I usually make a pot of this chili on a Friday so Jo and I will eat it for dinner Friday night. Then there are enough leftovers for me to have chili 4 or 5 times over the next week, and another 4 or 5 times container for the freezer for the future. And now, I've even managed to healthy it up a bit!

CHILI


First up is to brown the meat. I used to use a pretty lean (93%) ground beef, but since beef is so high priced right now, I picked up ground turkey that was on sale for $1.25 a pound! And with all the spices in the chili, you can't tell that it's not beef.

Into the pot it goes to brown. The turkey is healthier AND cheaper. Win-win! As it's browning, I assemble the rest of the ingredients.


For a full crock or pot, I use:
 2 pounds of meat
 28-oz can of tomato sauce
 28-oz can of diced tomatoes
 2 cans (15-oz) Kidney beans (liquid included)
 2 cans (15-oz) Pinto beans (liquid included)
 1 can (4-oz) diced chiles
 1/2 onion, chopped
4 Tablespoons chili powder (I use Tones Mild chili powder)
2 teaspoons cumin
2 teaspoons black pepper
4 teaspoons salt
2 cups water


As the meat finishes browning, it's time to open up some cans. I love my new can opener that doesn't leave a sharp edge!


Look at that! I can touch the top of the just-opened can and NOT get cut!

I can still remember when I had that OLD can opener...bad injury...all the way down to the 2nd knuckle. ;)

Kidding, of course. Fortunately, I still have all my digits! 
OK, let's put this thing together!
When the meat is done browning, drain any fat (with the turkey, there isn't much). Then we add the ingredients. Tomato sauce...


Tomatoes...


Beans (with liquid)...


Green chiles and chopped onion...


And all the spices...

Now, add 2 cups of water...


I made meat loaf a few nights ago and had leftovers for lunch the next day. Tired of meat loaf now, but still have a piece left. Since I probably won't eat it and don't want to waste it, let's crumble it up and add it to the chili!


Stir it all up, bring it to a boil, and turn down to simmer. Cover and let simmer for about 3 hours, stirring about once an hour.

Now, it's time for Chili!!!! Dig in!


I like my chili with some chopped up raw onion mixed in. Jo prefers hers with some cheese, Fritos, and a dollop of sour cream.


I never get tired of chili! And it's really a pretty healthy meal. And with this recipe, I think it'll be a LONG time before I move on to a different phase of chili.